Back in my darkroom days of old, I experimented with toning my photographs. After developing an image on warm tone paper, I would expose the print to various combinations of toners such as sepia and selenium to achieve a “split tone” effect such that there would be different colors in the shadows, mid-tone and highlight areas. The results weren’t always that repeatable and would change from when the session began to when it ended because of oxidation and gradual exhaustion of the chemicals.
I’ve been using the “digital darkroom” for almost 15 years now and have also done experiments for toning my digital images. With photoshop, there are many techniques to tone your photographs using adjustment layers such as Hue/Saturation, Color Balance, Curves, etc. The Hue/Saturation adjustment layer is the simplest method but will only place a single hue over the image. This may be all that is needed in many cases.
My personal preference is to use the Gradient Map adjustment layer. This method involves mapping different colors to different luminance values in the image. Photoshop comes with many presets but using them often result in rather bizarre psychedelic effects. I prefer to make my own gradient maps that resemble the sepia/selenium colors found in the old darkroom split toning methods mentioned above as well as in some vintage photographs.
Below is a before and after example:

Original color image.

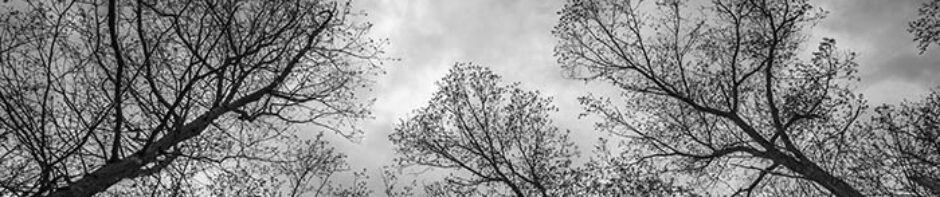
After B&W conversion.

After gradient map applied.
My preferred practice is to edit the photograph and convert it to black and white before applying the gradient map(s) to the image. What seems to work best for me are images that have lots of mid-tones and darks and smooth tonal transitions. Images with large areas of blank white masses do not seem to work as well. It is also important to use the Color blending mode when applying the gradient map(s). This ensures that the gradient map will only affect the color and will not alter the luminance values in the image.
Below are some additional examples of toned images. Click on an image for a larger view:
[print_gllr id=2996]
I am always interested in learning about PS and techniques used to garner a superior outcome for photographs. I am looking forward to reading more of your posts along those lines.